Simple Rustic Bread
Baking bread can often be quite intimidating, and at first, it can be tricky to determine whether you’ve let it rise or kneaded it enough. This rustic bread recipe is a great place to start because the process is actually really simple!

Baking bread is one of those things that can be super intimidating, at least initially. There have been countless times where I’ve ended up with a lump of dough that never rises or a dense bread that’s barely edible. This rustic bread recipe though? This one’s easy.
As with most things in life, practice makes perfect. And so what if your first bread-making attempt is a major flop? It’s really only flour and a little yeast that you’ve wasted. No big deal.

When Aaron and I first moved back from San Francisco, we both got really into bread baking. I think it was inspired by a combination of missing Tartine and needing a hobby to help us get through an absolutely brutal Boston winter. I had never seen so much snow in my life.
Aaron, in particular, became engrossed in every bread book he could get his hands on—The Bread Bible, Tartine Bread, and My Bread, being the top three. We tried methods from each, but ultimately decided that there were aspects from all of the books that we liked. After several months of trial and error (it was a loooong winter), we finally felt like we figured out how to make a loaf of rustic bread that rivaled some of our favorite bakeries.

Despite the lengthy instructions below, I promise this recipe is not nearly as complicated as it seems at first glance. It does take quite a bit of time, but most of it isn’t active work—letting the bread starter ferment and waiting for the dough to rise (twice) take up nearly all of the prep time.

Sure, you may have a little trouble with your yeast or handling the dough, but you will get the hang of it. And as I mentioned in my naan recipe a while back, you can mitigate a lot of the potential issues with the yeast. Specifically, rather than “proofing” active dry yeast with water that’s 110 degrees F and a little sugar, and then waiting 5-10 minutes to see if it gets bubbly, I recommend the nearly fool-proof method of using instant yeast instead.
Instant yeast doesn’t need to by re-hydrated or “proofed” the way active dry yeast does, and it can just be mixed in with your dry ingredients.


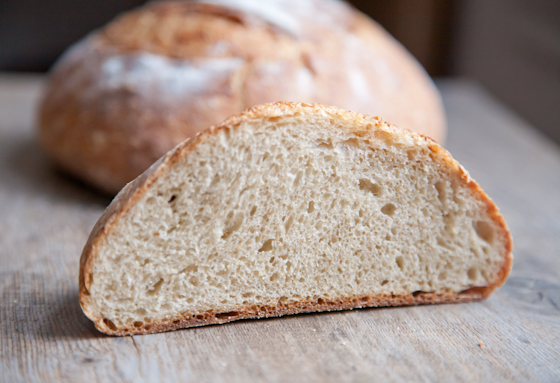
And as far as the “folding” goes before you bake the dough, a good way to think about it is to visualize folding a business letter: top down about a third of the way, bottom up to meet the top edge. You’ll want to do this from top to bottom, and then left to right a few times, until it’s difficult to stretch the dough to fold it again. Just make sure that when you fold the dough over itself, you press it just enough to get it to stick, without forcing out all of the air. This is what’s going to give you all of those nice bubbles/holes in the finished product.
The dough should now appear as a tight ball, which you can then place seam-side down on a plate dusted with a little cornmeal or flour while your oven pre-heats. I also like to dust a little flour over top and lightly score a “ ( ) “ shape or an “X” using a sharp knife or razor blade. I feel like the flour makes it look more “professional”, and cutting the top allows for a beautiful crust.

This rustic bread is a million times better than store-bought, and the cost is much less expensive than the $7 loaves from the bakery down the street. Plus, there’s something so satisfying and relaxing about kneading dough and turning a simple mix of flour, yeast, and water into bread. It’s the perfect way to spend a lazy Sunday.
- for the starter:
- 1 cup (158g) flour (your choice – I like to use a combination of 1/3 cup Whole Wheat and 2/3 cup all-purpose unbleached)
- 3 tablespoons (14g) ground wheat germ OR ground flax seed (optional, but if you don’t use it, you’ll need to add the same amount in flour to keep the wet/dry ratio balanced)
- 3/8 teaspoon (1.25g) instant yeast
- 1 1/4 teaspoon (9g) organic cane sugar
- 1 1/3 cups (322g) water, room temperature
- for the dough:
- 2 cups flour (312g) (again, I like to use a combination of 2/3 cup whole wheat and 1 1/3 cups all-purpose unbleached)
- 1/2 teaspoon (1.6g) instant yeast
- 1 1/2 teaspoon (10g) sea salt
- cooking spray or olive oil to grease the bowl
- cast iron dutch oven (see note below)
- Put the sugar and warm water in a large bowl and stir to dissolve. Combine the yeast, flour and wheat germ/flax seed (if using), then add it to the water/sugar. Whisk until it looks like pancake batter. Cover with tin foil or plastic wrap. Let the mixture ferment at room temperature for 30 min. and then place it in the refrigerator overnight. Alternatively, you can simply let it sit at room temperature for 4 hours before making dough.
- Combine the yeast and flour in a bowl. Take the starter out of the refrigerator (if you’re using that method) and gently lay the yeast/flour mixture over the top of the starter. Do NOT mix it in. Cover the bowl with plastic wrap or a dish towel and let it ferment at room temperature for 2-4 hours. The amount of time is dependent on temperature / humidity. The starter will eventually burst through the flour on top, and this is when you know it’s done.
- Using a wooden spoon or the dough attachment on your stand mixer, begin mixing. Once it forms a shaggy/rough dough, let it sit for 20 minutes so that the flour can absorb all the water.
- Sprinkle all of the salt over the dough and mix it into the dough using the wooden spoon or the dough attachment on your stand mixer. Turn the dough out onto a clean surface (don’t flour it) and knead for 5 to 10 minutes. The dough should be a bit sticky. If it’s not sticky at all, add a little water. If it’s sticky to the point that some of it comes away from the dough mass with your fingers, add a little flour. It should cling slightly to your fingers but not come away with them.
- Lightly oil the bowl and return the dough to it. Turn the dough once or twice in the bowl to coat it in oil. Let the dough rise until it has doubled in size. This can take anywhere from 1-4 hours, again depending on environment. You can speed this process up by increasing the temperature, such as by placing it in a slightly warm oven or near a heater.
- Once the dough has risen, turn it out onto a clean surface and fold it once or twice like a business letter and then return it to the bowl, being careful not to press out any air bubbles. You may need to lightly oil the bowl again. Let the dough rise for a 2nd time. It should double in size (or close to double).
- Turn the dough out onto a lightly floured surface and shape it. I give it several “business letter” folds, alternating vertically and then horizontally. Each time I’ll “seal” the fold by pressing down lightly on the folded edge of the dough and making sure not to press out the air bubbles. Do this until the outer surface of the dough feels tight. If it starts to rip you’ve done plenty. When you’re done you should have something that looks like a nice little dough “pillow.” Place the dough on a plate that you have sprinkled with flour or cornmeal.
- Preheat the oven to 500 degrees WITH the cast iron dutch oven IN the oven. When the oven is preheated, take the dutch oven out (carefully) and using a spatula (or two) carefully move the dough from the plate to the shallow part of the dutch oven. Slash the top of the dough with a razor blade in two places. A “ ( ) “ shape or an “X” works well.
- Quickly cover the dutch oven with its other, deeper top and return it to the oven quickly. Immediately reduce the oven temperature to 450 degrees F and bake for 20 minutes.
- Quickly remove the top of the dutch oven and bake for another 15-20 minutes. Try not to let too much heat out of the oven. Remove the bread from the oven and transfer to a cooling rack. If you tap the bottom of the bread it should sound very hollow. If it doesn’t, put it back in the oven for a few more minutes.