How to Make Kombucha: Growing a SCOBY
Before you decide to grow your own kombucha SCOBY, please read my more recent how to make kombucha post to learn why I now recommend purchasing a Brew Now Kit from Kombucha Kamp.
…
Below is my original “How to Make a Kombucha SCOBY” recipe:
I’ve mentioned it several times on the blog before, but I absolutely love kombucha. Although I am not a fan of beer (unless it’s pumpkin, blueberry, or basically tastes like juice), there’s something about the slightly fizzy, acidic flavor of kombucha that I crave. Unfortunately, regularly drinking it sets me back close to $4/bottle and that adds up really fast. So, like my previous Starbucks habit, I’ve curbed it to a couple of times a month.

For the last few months, I’ve been really interested in learning how to make kombucha. The process seemed simple enough, and to be honest — part of me kind of likes the idea of being “that girl” who brews her own kombucha. It one-ups the hippiness factor of things like drinking green juice, eating chia seeds, and using coconut oil as a moisturizer. The kombucha recipe I’m sharing below is what’s worked well for me. Don’t be deterred by the longer-than-usual instructions; I’ve made them intentionally detailed so you’ll know exactly what to do, and it’s actually very easy, I promise!
Next: Learn how to use your kombucha SCOBY to brew your first batch!

- 1 bottle of raw plain kombucha (I used GT brand)
- 5 cups water, divided
- 1/3 cup plus 2 tablespoons organic sugar (I used raw turbinado)
- 3 bags of organic green or black tea (or 3 tablespoons of looseleaf tea)
- 1 quart glass jar
- 1 gallon glass jar
- clean cloth or paper towels
- a rubber band
- Purchase a bottle of raw, plain kombucha with lots of yeast floating at the bottom (those are the weird strands that are a little scary to drink, but the more the merrier in this case). I like the GT Organic Raw Kombucha that you can find at Whole Foods and other health food stores.
- Pour all but 1 cup of the kombucha into a glass – you only need that bottom cup with all of the strings of yeast to grow your scoby. The rest you can drink!
- In a small saucepan, bring 1 cup of water to a boil. Add 2 tablespoons of sugar to the boiling water and stir to dissolve. Turn off the stove and add 1 bag of organic green or black tea (or 1 tablespoon of loose leaf tea). Cover the saucepan to prevent the mixture from evaporating and allow it to come to room temperature. This will take some time, but it’s important that the mixture has cooled before moving on to the next step or you’ll kill all that good bacteria in the bottled kombucha.
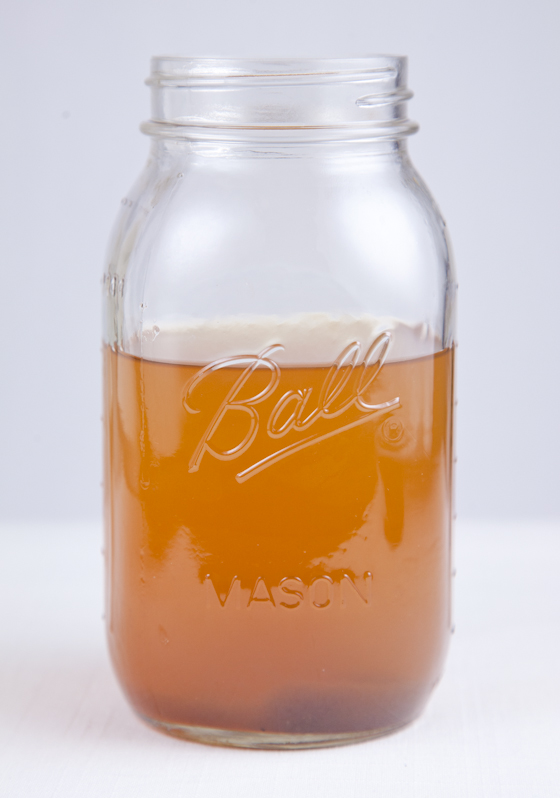
- Once the water/sugar/tea mixture has cooled to room temperature, remove the tea bag and pour the mixture into a large glass jar (I used a 1 quart Ball jar). Add to it the 1 cup of reserved kombucha.
- Cover the top of the jar with a clean dish towel or 2 layers of paper towels and secure it with a rubber band. This will keep fruit flies and other bugs out, while still allowing air to circulate.
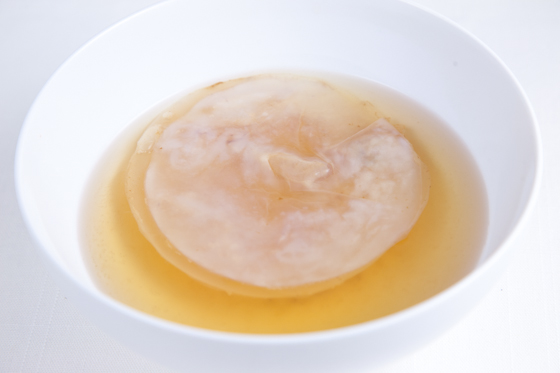
- Place the jar in a warm, dark spot (I chose the top, back shelf in my pantry) where it won’t be disturbed, and allow it to to sit for about 7 days before taking a peek. You should see a thin, cloudy-looking film growing over the top of the mixture—this is good! It’s the baby scoby that will grow into “the mother” that you’ll be using to brew your kombucha.
- Once the film has grown to be about 1/8th of an inch thick, you’ll need to feed it again. This time, boil 4 cups of water, add 1/3 cup of sugar to the boiling water and stir to dissolve. Turn off the stove and add 2 bags of organic green or black tea (or 2 tablespoons of loose leaf tea). Feel free to use a mixture of green and black tea too. Cover the saucepan to prevent the mixture from evaporating and allow it to come to room temperature. Again, this will take some time, but it’s important that the mixture has cooled before moving on to the next step.
- Once cooled, remove the tea bags and transfer the mixture to a large glass jar (I switched from a Ball jar to a 1 gallon jar). Add to it the contents of the original 1 quart jar (all of the kombucha liquid and the baby scoby). Again, cover the top of the jar with a clean dish towel or 2 layers of paper towels and secure it with a rubber band. Return it to the warm, dark spot for another week and a half to 2 weeks. Once the scoby is 1/4 to 1/2 an inch thick, it’s ready to make your first batch of kombucha!
